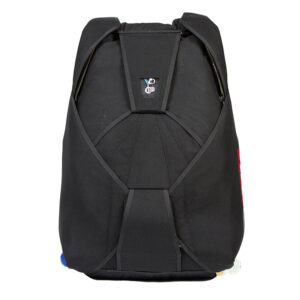
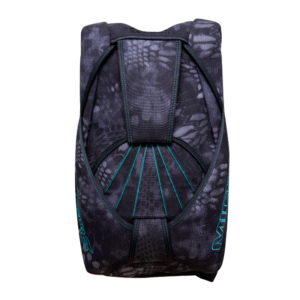
UPT Sigma Tandem Container
€7,000.00UPT Sigma Tandem Container: The Ultimate Tandem Skydiving Solution When it comes to tandem skydiving, safety, reliability, and ease of use are paramount. The UPT Sigma Tandem Container offers these qualities and more, making it the preferred choice among professional tandem instructors worldwide. Designed with meticulous attention to detail, this container combines cutting-edge technology with user-focused innovation. Whether you are a seasoned tandem instructor or an aspiring professional, the Sigma Tandem Container ensures every jump is smooth, secure, and effortless.UPT Sigma tandem rig Innovative Design for Enhanced Safety and Comfort Every aspect of the UPT Sigma Tandem Container has been engineered with safety at the forefront. The container’s structure provides optimal harness comfort for both instructor and passenger. Ergonomic features reduce fatigue and improve body positioning during freefall and canopy flight. The tandem harness system includes adjustable straps and padding, which accommodate a wide range of body types while maintaining secure restraint.UPT Sigma tandem rig Notably, the container is built with robust, abrasion-resistant materials, protecting your gear through countless jumps and harsh conditions. Reinforced stitching and high-grade hardware guarantee long-term durability. The Sigma Tandem’s streamlined design minimizes bulk without sacrificing strength, contributing to increased aerodynamics and reduced drag. Key Features of the UPT Sigma Tandem Container Premium construction materials: Durable 1000D Cordura fabric with reinforced stitching Adjustable tandem harness system: Customizable fit for instructors and passengers Ergonomic padding: Enhanced comfort during freefall and canopy flight Robust main and reserve containers: Secure deployment with smooth extraction Efficient deployment system: Low-profile handles designed for fast, intuitive use Anti-inversion flaps: Prevent line twists and riser tangling Integrated safety systems: Compliant with all international skydiving regulations Multiple reserve pilot chute options: To match different canopy sizes and preferences Lightweight design: Reduces overall pack weight while maintaining safety Streamlined aerodynamics: Promotes stable body positioning and control UPT Sigma Tandem Container Outstanding Performance in Every Jump Performance consistency matters greatly in tandem skydiving. The Sigma Tandem Container delivers reliable results jump after jump. Its expertly balanced weight distribution enhances freefall stability, allowing the instructor to maintain precise control. Meanwhile, the passenger benefits from a comfortable harness that supports their posture throughout the flight.UPT Sigma Tandem Container Furthermore, the reserve container’s deployment is engineered to be swift and trouble-free. This translates to peace of mind knowing that emergency procedures can be executed smoothly under any circumstance. The container’s design also minimizes opening shock, protecting the tandem pair during parachute deployment.Sigma tandem skydiving container Setup Guide: UPT Sigma Tandem Container Setting up the UPT Sigma Tandem Container correctly is essential for optimal safety, performance, and comfort during every jump. Whether you’re new to tandem operations or simply need a refresher, this step-by-step guide ensures your rig is jump-ready with confidence and consistency.Sigma tandem skydiving container Let’s walk through the complete setup process—from pre-check to harness fitting and deployment readiness. 🧰 Step 1: UPT Sigma Tandem Container Pre-Setup Inspection Before beginning setup, it’s crucial to perform a thorough gear inspection. Never skip this process, even if the container was recently packed. Inspect the following areas carefully: Container shell: Check Cordura fabric for any signs of fraying, tears, or abrasion. Harness webbing: Inspect for stitching integrity, wear marks, or cuts. Handles (main & reserve): Ensure they’re properly seated, secure, and accessible. Hardware (buckles, rings, adjusters): Look for rust, cracks, or deformation. Risers and 3-ring system: Confirm proper routing and clean articulation. AAD display (if installed): Check for correct settings, battery level, and activation. Once everything passes inspection, proceed to the harness fit. 👥 Step 2: Adjusting the Instructor Harness Proper fit of the instructor harness ensures comfort, support, and precise control during freefall and canopy flight. Follow these adjustments: Put on the container using the shoulder straps like a backpack. Secure the chest strap and tighten it snugly without restricting breathing. Adjust the leg straps so they sit low across the upper thighs—not the hips—for ergonomic support. Tighten the laterals to secure the rig to your back and reduce play during movement. Double-check symmetry on both sides to ensure even tension and body alignment. 💡 Tip: Lean forward and simulate freefall position to test comfort and harness stability. 🪢 Step 3: Connecting the Passenger Harness Your passenger’s experience begins with how well they are secured. Comfort, stability, and fit all contribute to safety and confidence. Fitting the passenger harness: Have the passenger step into the leg loops first. Bring shoulder straps over and adjust them evenly. Clip and tighten the chest strap across the upper chest—not too high or low. Adjust leg loops snugly while maintaining comfort. Use the lower and upper lateral straps to cinch the harness inward and reduce shifting. Once harnessed, attach the passenger to the instructor harness using the four connection points: two shoulder rings and two hip attachment rings. 🧷 Step 4: Handle Checks and Placement Handle position is critical. You must be able to reach both main and reserve handles with either hand under any condition. Ensure the main deployment handle is secured in the BOC (bottom-of-container) pouch. Confirm the reserve handle is properly routed and secured under the reserve flap. Do a two-handle check before each jump—verify visibility, access, and tension. If you’re using an AAD, verify its activation and connection to the cutter loop. 🪂 Step 5: Canopy and Pilot Chute Setup Now, you’ll configure your main and reserve parachutes for deployment. Main parachute setup: Pack according to manufacturer guidelines or approved DZ procedures. Use appropriate line stows and pilot chute bridle routing. Tuck the pilot chute cleanly into the BOC pouch. Double-check closing loop tension and pin seating. Reserve parachute setup: Reserve must be packed by a certified rigger within the legal repack cycle. Inspect closing loop, pin, and cutter position (if using AAD). Verify reserve closing sequence for secure flap layering. 💡 Pro Tip: Keep a log of pack dates and AAD service intervals to avoid surprises. 🔄 Step 6: UPT Sigma Tandem Container Final Pre-Jump Checks (Gear Up Check) Right before boarding the aircraft, perform a systematic gear-up…


